
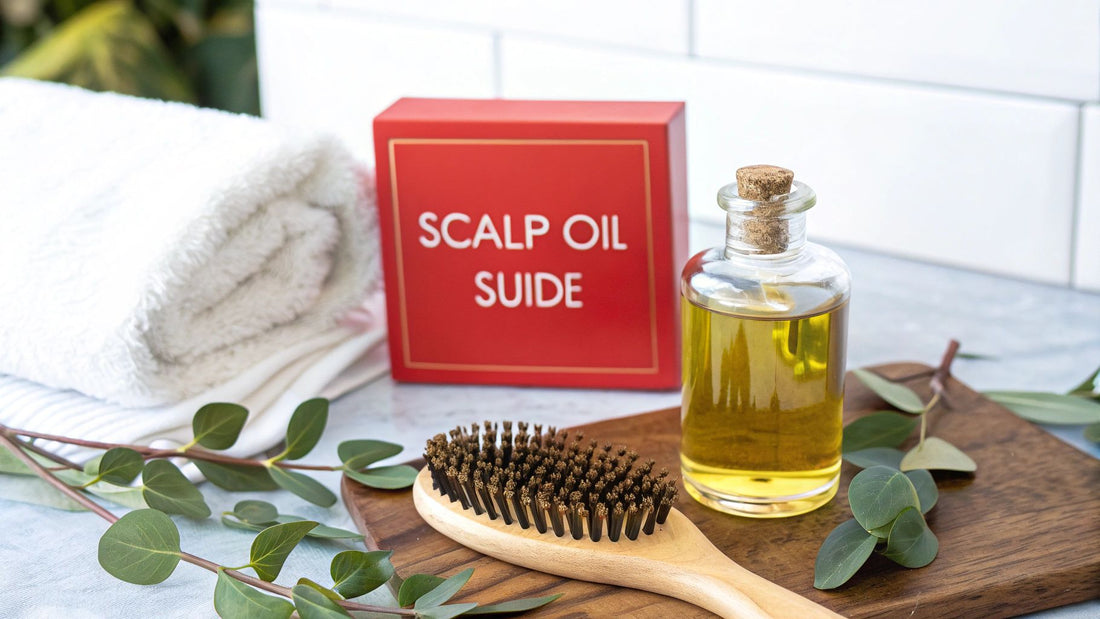
Hair Oil for Dry Scalp: Your Complete Success Guide
Why Your Dry Scalp Feels Like an Endless Battle
If you're stuck in a frustrating loop of itching, flaking, and tightness, you already know how maddening a dry scalp can be. It's a common reflex to grab an anti-dandruff shampoo, only to find the problem gets even worse. This often happens because dry scalp and dandruff are not the same thing. Dandruff is usually caused by too much oil and a yeast-like fungus, while a dry scalp is crying out for moisture, which leads to those small, dry flakes and constant irritation.
Think of it like the skin on your face. If your face felt tight and parched, you wouldn't attack it with a harsh cleanser meant for oily skin, would you? You’d reach for a good moisturiser. Your scalp deserves the same gentle care. This is where a quality hair oil for dry scalp can be a true game-changer, helping to replenish lost moisture and create a soothing, protective barrier.
The Underlying Causes
So, what’s actually causing your scalp to lose its natural moisture? It's often a combination of things. Over-washing your hair is a big one, especially if your shampoo is packed with harsh sulphates. These ingredients are great at cleaning but can also strip away your scalp’s natural oils, leaving it exposed and unhappy. The environment plays a part, too. Here in the UK, that shift from chilly, dry air outside to warm, centrally heated homes can really do a number on your scalp's hydration.
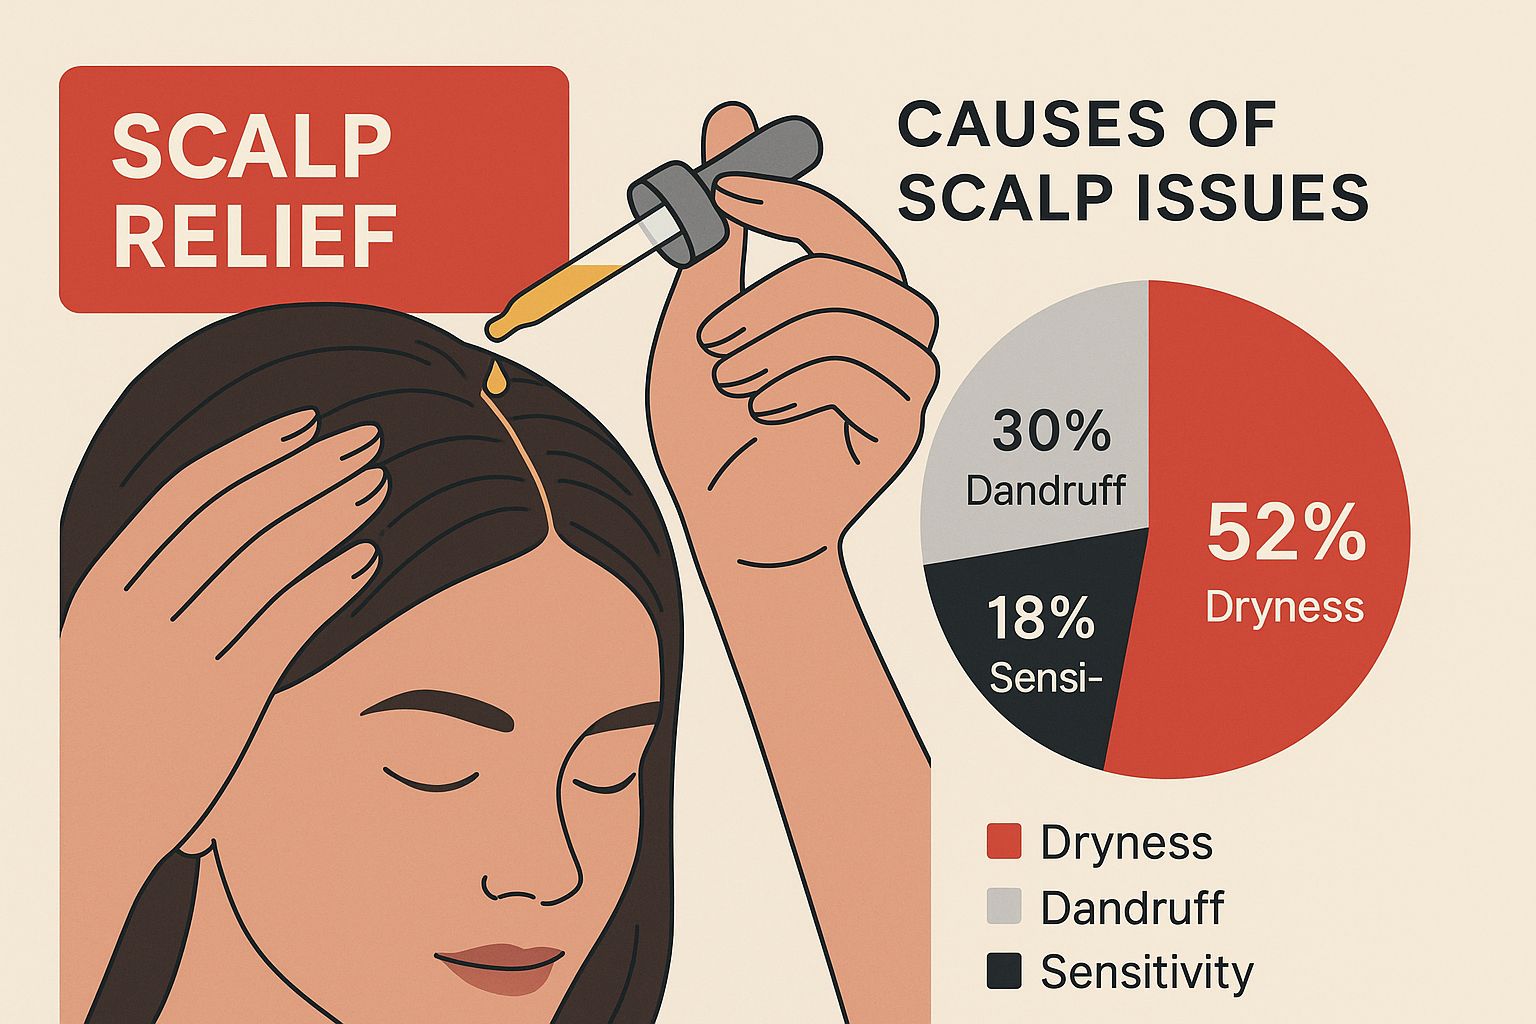
It might surprise you, but your lifestyle is also closely linked to your scalp's health. Stress can cause hormonal shifts that affect oil production, and a diet low in essential fatty acids can leave your skin—scalp included—feeling dry. You're definitely not alone in this; dermatological studies show that around 16.6% of people deal with excessive scalp flaking, with some research suggesting men experience it slightly more often. This just goes to show how common the issue is and why getting to the root of the problem is the first step towards finding lasting relief. You can learn more by exploring this full study about scalp conditions.
Finding Your Perfect Hair Oil Match
Choosing the right hair oil isn’t about grabbing the most popular bottle off the shelf; it’s more like playing detective for your scalp. What works wonders for your friend might leave your hair feeling greasy or do nothing at all. Why? Because every scalp has its own unique needs. The real secret is understanding the ingredients and how they work. Some oils sit on top of the skin to seal in moisture, while others absorb more deeply to deliver nutrients right where they’re needed.
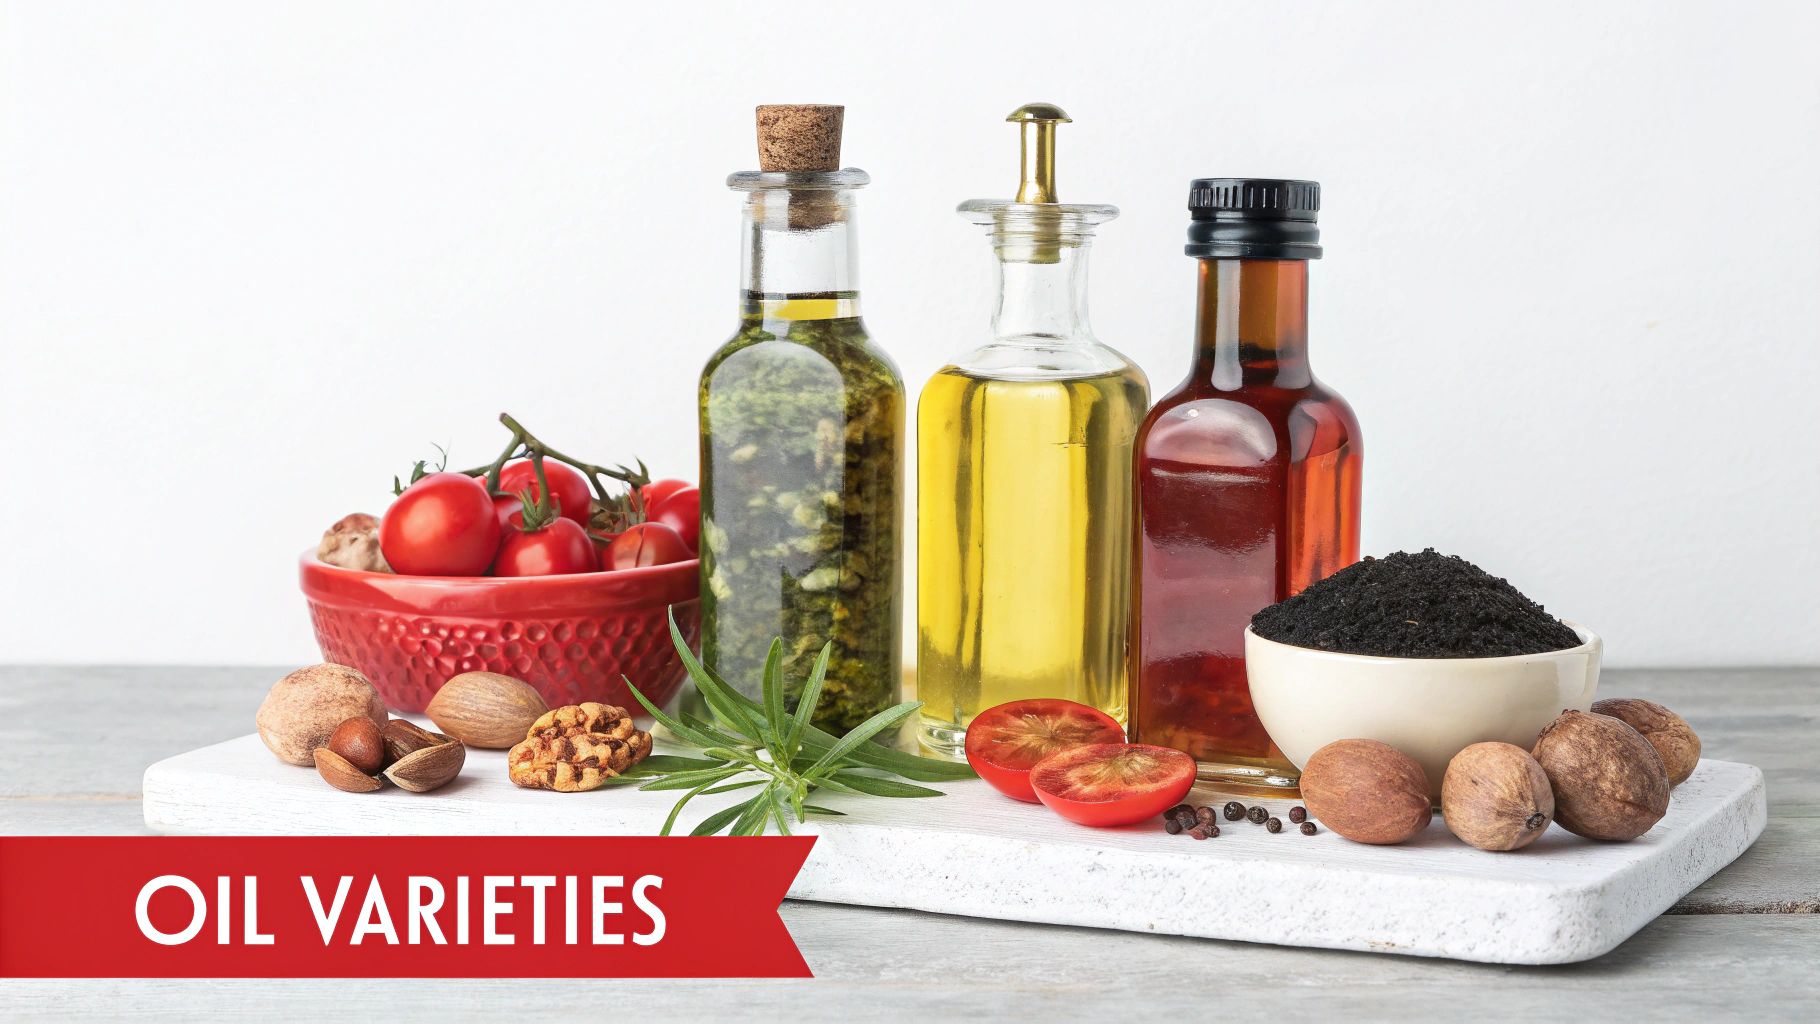
A great place to start is knowing the difference between carrier oils and essential oils. Carrier oils—think jojoba, coconut, or argan—form the gentle, nourishing base of a hair oil. You can use them quite generously as they are packed with fatty acids that mimic your scalp's natural oils. On the other hand, essential oils like tea tree, peppermint, or lavender are powerful plant extracts added for their targeted benefits, such as calming inflammation or fighting microbes. They're very concentrated and must always be diluted in a carrier oil to be used safely on the skin.
Decoding Key Ingredients
When you're scanning product labels, keep an eye out for ingredients known for their soothing and moisturising properties. Jojoba oil is a real hero here because its chemical structure is incredibly similar to our skin's own sebum. This means your scalp welcomes it with open arms, absorbing it easily without that heavy, greasy feeling. If itchiness and flakes are your main concern, adding a few drops of tea tree oil to your blend can be a game-changer, thanks to its natural anti-inflammatory and antiseptic qualities. If you're looking to build a routine with thoughtfully created products, you can explore a curated selection in our hair care collection.
To help you navigate the world of hair oils, here's a quick comparison of some of the best ingredients for tackling a dry scalp.
Hair Oil Ingredients Comparison for Dry Scalp
A comprehensive comparison of popular hair oil ingredients, their benefits for dry scalp, and best application methods
| Oil Type | Primary Benefits | Best For | Application Frequency |
|---|---|---|---|
| Jojoba Oil | Mimics natural scalp sebum, non-greasy, moisturising. | All scalp types, especially oily but dehydrated scalps. | 2-3 times per week as a pre-shampoo treatment. |
| Coconut Oil | Deeply moisturising, prevents protein loss, has antimicrobial properties. | Very dry, flaky scalps and damaged hair. Can be too heavy for fine hair. | Once a week as a deep conditioning mask. |
| Tea Tree Oil | Anti-inflammatory, antifungal, and antiseptic. Soothes itchiness. | Itchy, irritated, and dandruff-prone scalps. Must be diluted. | Mix a few drops with a carrier oil, 1-2 times per week. |
| Argan Oil | Rich in Vitamin E and antioxidants, hydrates and softens without being heavy. | Dryness, frizz, and adding shine. Suitable for most hair types. | Can be used daily on ends, or 1-2 times per week as a scalp treatment. |
| Peppermint Oil | Stimulates circulation, provides a cooling sensation, can help with itchiness. | Promoting scalp health and soothing irritation. Must be diluted. | Add a few drops to a carrier oil, use as a pre-shampoo massage once a week. |
As you can see, different oils offer unique benefits. Jojoba is fantastic for balance, while coconut provides intense moisture. The key takeaway is to choose an oil that targets your specific concerns and always dilute potent essential oils.
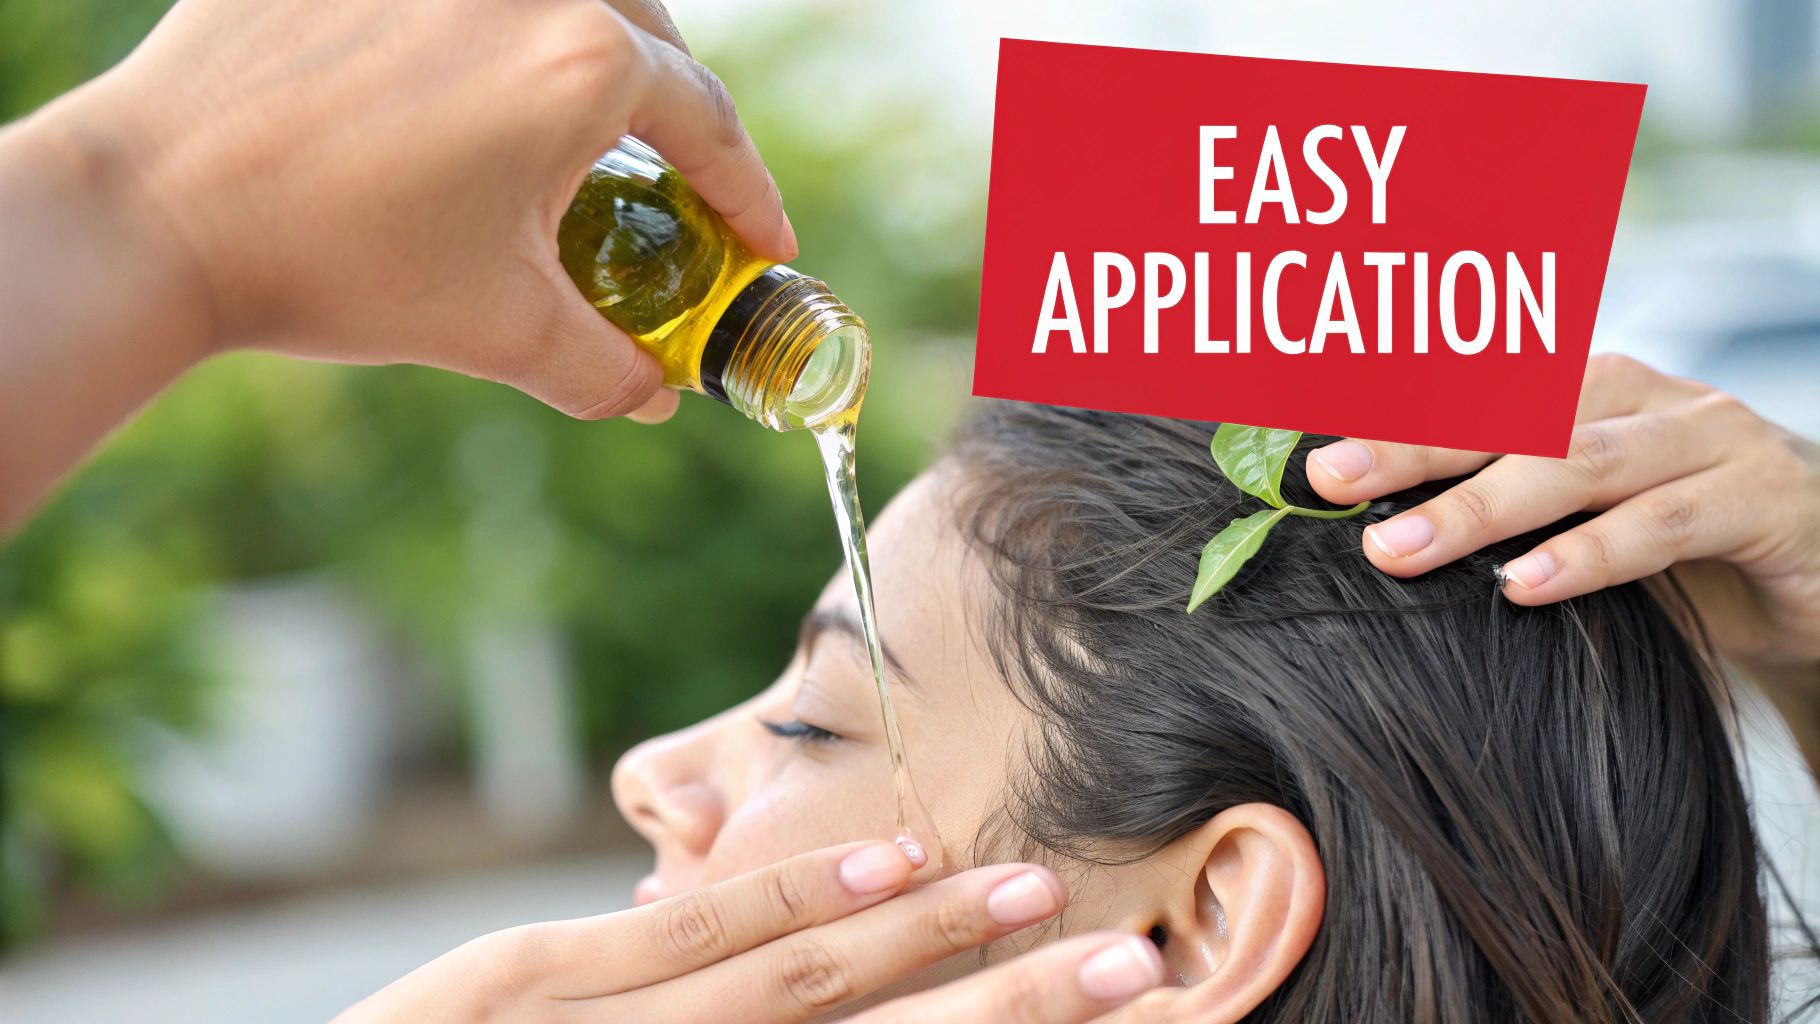
This infographic shows how targeted application is key to providing scalp relief.
 As the image highlights, applying the oil directly to your roots ensures the active ingredients can get straight to work on the problem area. A common mistake is just coating the hair strands, which won’t do much for a dry, itchy scalp.
Before you go all-in with a new product, always perform a patch test. Just apply a tiny amount behind your ear and wait 24-48 hours to check for any redness or irritation. It’s a simple but crucial step that can save you from a lot of potential discomfort and frustration.
Setting Up Your Scalp For Oil Success
Think of it like this: you wouldn't paint on a dirty canvas, would you? The same idea applies to your scalp. You could have the most amazing hair oil for dry scalp, but if you're applying it over a layer of product build-up and dead skin, it's not going to do much. The oil simply can't get through to do its job, leaving your hair feeling greasy rather than deeply nourished.
Clearing the Way for Moisture
Your prep work actually starts before you even get your hair wet. I've found that a gentle dry brush of the scalp works wonders. Grab a soft-bristled brush or just use your fingertips, and work in small, circular motions across your head. The goal isn't to scrub hard, but to gently exfoliate. This helps lift away any flakes and gets the blood flowing to your hair follicles, making them ready to soak up all the goodness from the oil.
When you're ready to apply the oil, a little bit of warmth can make a huge difference. While room-temperature oil is perfectly fine, warming it up slightly helps it spread much more easily and absorb better into the skin.
- Give it a Warm Bath: Just pop your bottle of oil into a bowl of warm (not boiling!) water for a couple of minutes.
- Do a Quick Temp Check: Always dab a little on your wrist before applying it to your scalp. You want it to be comfortably warm, never hot.
This simple step turns your routine into a lovely, spa-like ritual. It creates the perfect setting for your chosen oil to work its magic and bring some much-needed relief to your dry scalp.
Mastering The Application That Gets Results
 One of the biggest mistakes I see people make is thinking that more oil equals more moisture. In reality, how you apply your hair oil for dry scalp is far more important than how much you use. It's the difference between ending up with a greasy mess and finding genuine, lasting relief. The secret is a targeted, methodical approach that ensures every part of your scalp gets the attention it deserves without drowning your hair.
The Right Way To Apply Hair Oil
Forget just pouring oil directly onto your head. For a controlled, even application, it’s all about sectioning your hair. Think of it like you’re colouring your roots at home; you need clean, direct access to the skin to get the job done properly.
Here’s a simple routine that works wonders:
- Part Your Hair: I always start by creating a parting down the centre. Using a dropper or just my fingertips, I apply a few drops of oil directly along the part. A little goes a very long way here – you're aiming for a thin film, not a drenching.
- Gentle Massage: With the pads of your fingers (never your nails!), gently massage the oil into your scalp using small, circular motions. This doesn't just feel amazing; it also helps to stimulate blood flow, which is brilliant for delivering nutrients to the hair follicles.
- Section and Repeat: Create a new parting about an inch away from the first one and repeat the process. Keep working your way across your entire scalp, section by section, until every area has been lightly coated.
This technique makes sure the oil is treating your skin, which is the source of the dryness, rather than just sitting on your hair. After you’ve finished, you can leave it on for anywhere from 30 minutes to a few hours before washing it out. Treating your scalp with this kind of care can have wonderful knock-on effects, much like a great skincare routine leads to radiant skin. If you're interested in that, we also have a guide on how to get naturally glowing skin that shares similar ideas about mindful self-care.
Building A Routine That Actually Sticks
So you've found the perfect hair oil for dry scalp and you know how to apply it—that's brilliant! But the real game-changer is consistency. The aim here isn't to create some elaborate, time-draining ritual that you'll ditch after a week. It’s about weaving a simple, effective habit into your life, whether you're juggling parenting duties or always on the move.
Finding Your Frequency
Let's clear one thing up: you don’t need to be oiling your scalp every single day. For most of us, a pre-shampoo treatment 2-3 times per week is the sweet spot. This is usually enough to combat dryness without leading to product build-up or greasy hair.
If your scalp is particularly parched and irritated, you could begin with three times a week and then ease off as you notice things improving. The most important thing is to listen to your scalp. If it starts feeling a bit oily or your hair feels heavy, it's a clear sign to dial it back a bit.
Your routine should also be adaptable. During the cold, dry air of a UK winter, you might find you need an extra oiling session. Come the humid summer months, once a week might be all you need. Being flexible is key. This personalised approach is becoming more popular, as the UK market for scalp treatments grows to meet our demand for natural, effective solutions. You can read more about this trend in scalp care and see how it's shaping the products we use.
Complementary Practices for Better Results
To truly get the best from your oiling routine, it helps to look at the bigger picture. A few small tweaks to your daily habits can make a world of difference.
- Hydrate from the Inside: It sounds simple, but drinking enough water is fundamental for healthy skin, and that includes your scalp.
- Be Gentle with Your Hair: Opt for sulphate-free shampoos that don't strip away your natural oils. Also, try to avoid washing your hair with scalding hot water, as it can worsen dryness.
- Eat for Scalp Health: Foods rich in omega-3 fatty acids, like salmon and walnuts, can help tackle dryness from within.
These small, consistent efforts really do add up over time, leading to a happier scalp and healthier hair. For more inspiration, check out our guide to 8 sustainable and healthy hair tips.
Reading The Signs: Is Your Routine Working?
When you start a new routine with a hair oil for dry scalp, it's tempting to peer into the mirror looking for a miracle overnight. But how do you know if it's really making a difference or just a fleeting fix? The first couple of weeks are all about adjustment. You might even find your scalp feels a little greasier than usual as it figures out its new normal for sebum production—don't panic, this is common. Real progress isn't a single "aha!" moment, but a slow and steady improvement in your main symptoms.
Tracking Real Progress
Instead of getting caught up in the day-to-day, focus on the bigger picture over several weeks. You'll know you're on the right track when you notice:
- Flakes are fading: Are the white specks on your dark tops becoming smaller and less of a constant feature?
- The itch is gone: Do you find yourself reaching up to scratch your head less often during the day?
- Your scalp feels calmer: After you wash your hair, does your scalp feel soothed and hydrated instead of tight and thirsty?
These are the real indicators that your chosen oil is getting to the heart of the dryness. It's a significant issue for many; in the UK, the anti-dandruff market—which often overlaps with dry scalp care—held a massive 40.14% revenue share in 2024. This shows just how many people are looking for solutions like conditioning oils. You can find more details about the UK hair care market on grandviewresearch.com.
To help you gauge your results, it's useful to track what you see and feel over time. This table breaks down what to look for and when.
| Time Period | Positive Signs | Concerning Signs | Action Required |
|---|---|---|---|
| Week 1-2 | Initial calming of severe itchiness. Scalp may feel slightly more hydrated post-treatment. | Increased redness, new bumps or pimples, persistent or worsening itchiness. | Stop immediately. This suggests a sensitivity or allergic reaction. Wash the oil out and give your scalp a break. |
| Week 3-4 | Noticeable reduction in the size and frequency of flakes. Less overall scalp tightness. | Flaking and itching remain exactly the same with no improvement. Scalp feels overly greasy. | Re-evaluate your frequency. You might be applying too much or too often. Try reducing to once a week. |
| Month 2 | Scalp feels balanced—not too dry, not too oily. Visible flakes are rare. | Symptoms improved initially but have now returned or plateaued. | Consider a new oil. Your scalp may have adapted, or the oil isn't addressing the root cause. Try a different formulation. |
| Month 3+ | Consistent comfort and minimal symptoms. Hair looks healthier at the roots. | Any return of significant flaking, pain, or persistent irritation. | Consult a professional. If consistent home treatment isn't working, it's time to see a dermatologist to rule out other issues. |
Ultimately, this table is a guide to help you listen to your scalp. Patience is key, but so is knowing when to change course.
When to Rethink Your Approach
While a little adjustment time is normal, there are definite red flags that mean your oil or routine isn't a good match. If you see increased redness, develop painful bumps, or the irritation just won't quit after a couple of weeks, that’s your scalp telling you to stop. These signs often point to a sensitivity to a specific ingredient.
Likewise, if you've been consistent for a solid month and see absolutely zero change in flaking or itchiness, it's probably time to switch things up. This doesn't mean failure; it just means that particular formula isn't what your scalp needs. You could try an oil with different properties or book an appointment with a dermatologist to investigate if something else is going on. The most important part of this entire process is paying attention to what your scalp is telling you.
Your Scalp Success Action Plan
When you bring it all together, you realise the key to beating a dry scalp isn’t some miracle product, but a thoughtful, consistent routine. Your scalp really just needs a bit of gentle prep, the right hair oil for dry scalp, and a regular application schedule. Think of this not as another chore, but as a small, peaceful ritual that will pay off with lasting comfort and relief.
Your Quick Reference Guide
Here’s a simple blueprint to help you get started and stay on track:
- Prep is key: Before you even reach for the oil, gently exfoliate your scalp. You can use just your fingertips or a soft brush to lift away any flakes. This simple action primes the skin, making it ready to absorb all the goodness from the oil.
- Apply with care: Part your hair into sections and use a small amount of oil directly onto your scalp. It's easy to overdo it, but trust me, a little goes a very long way.
- Massage it in: Now for the relaxing part. Use the pads of your fingers to massage the oil into your scalp using small, circular motions. This not only feels amazing but also helps to boost circulation to the area.
- Patience is a virtue: Real change doesn't happen overnight. Stick with your new routine for at least a month before looking for big results. Consistency is what will make all the difference.
A calm, hydrated scalp is completely within your reach. With these techniques, you have a clear path to finally soothe that itch and say goodbye to flakes for good.
Ready to start your journey to a healthier scalp with products that truly care? Explore the LULUMINE hair care collection to find your perfect match.